
Gymnastics Hair Bun Guide
(Step by Step)
Materials Needed to Make a Hair Bun
Before you get started make sure to have the following products nearby
1) Hair Spray or Gel
2) 2 Hair Bands
3) Hair Net (Should Match Hair Color)
4) Hair Clips
5) Hair Bobby Pins
6) Comb
7) *Optional* Decoration Hair Pins
Where to Position the Hair Bun
Step 1
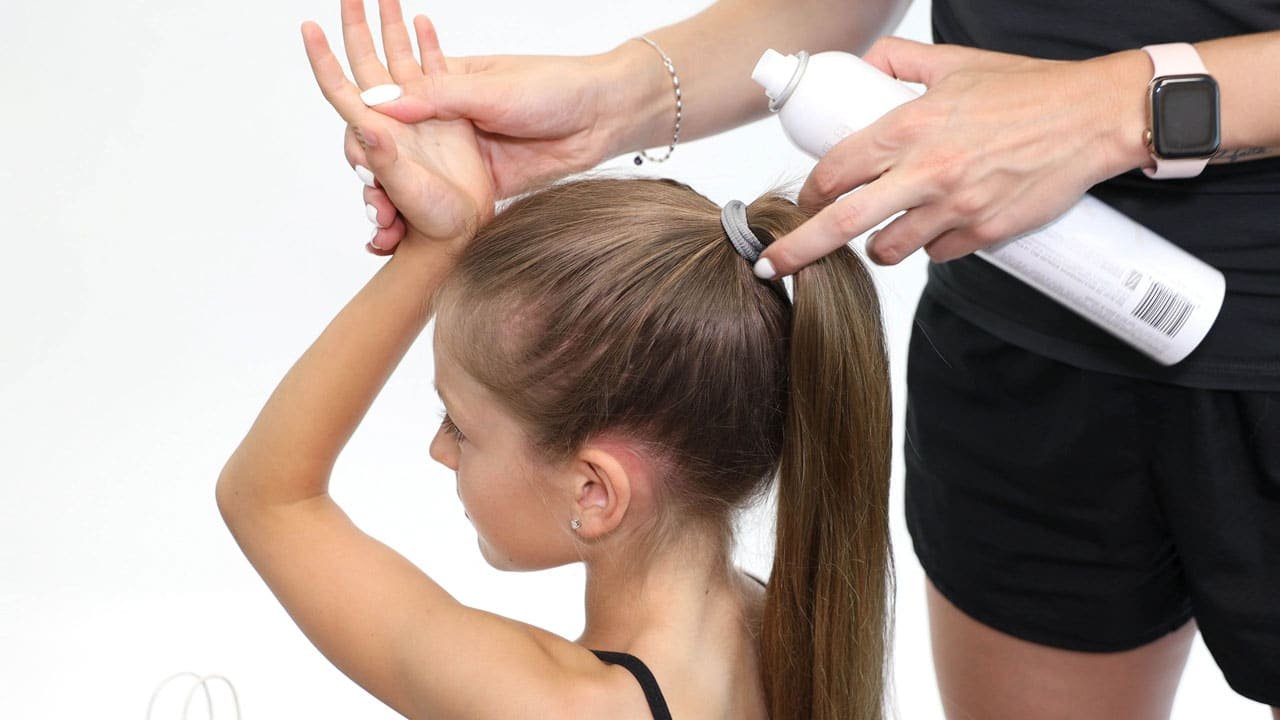
The first step is to set the placement for the ponytail. An easy way to know how to space your hair bun is by having the athlete place their palm from the middle of their forehead and make a ponytail where their fingertips end.

Step 2
To minimize bumps/frizz we use a comb and hair spray. Spray around the ponytail and comb the hair towards the pony tail. It is better to do this while the hairspray is still slightly wet (if it dries, then combing and making the hair bun becomes more difficult).

How to Minimize Hair Frizz
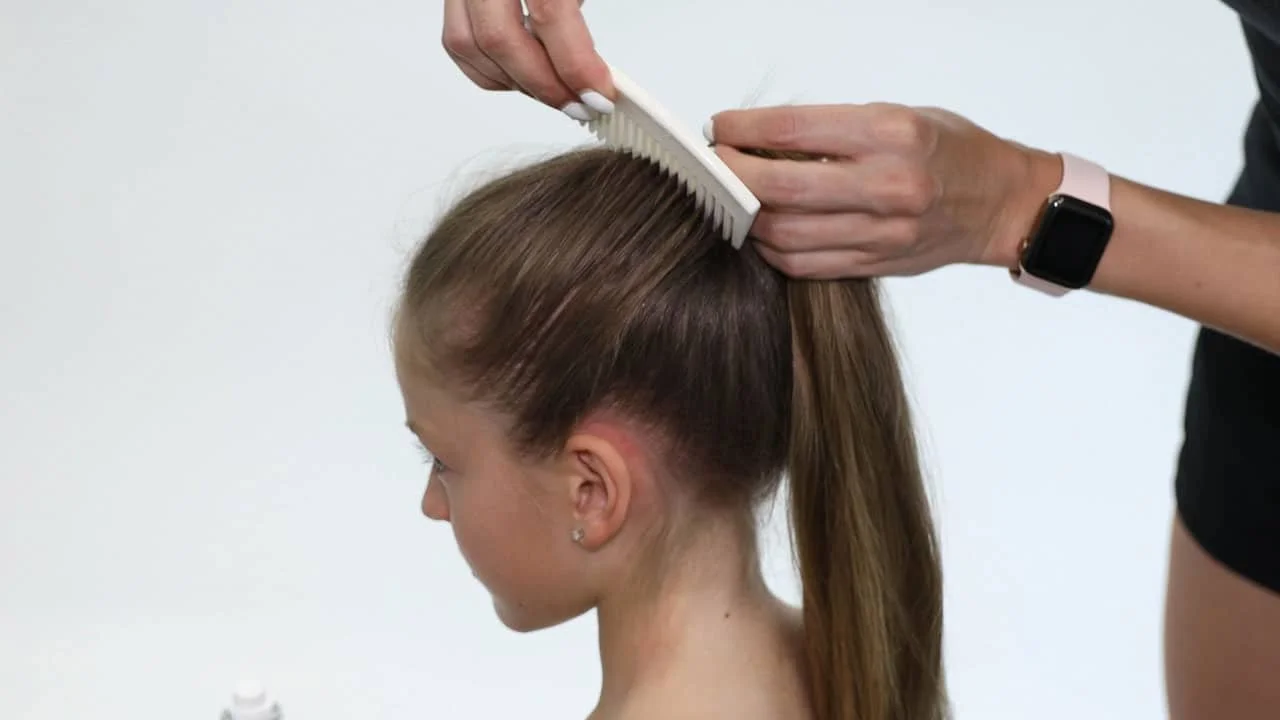
Step 3
After combing all the hair towards the pony tail we remove our hair bands and redo the pony tail again. This helps ensure that there is no frizz and leaves our finished bun looking neat and careful. We use two hair bands and make 3 loops with our ponytail to keep our ponytail tight, this also helps the bun last longer even after physical activity. The most important part of making a hair bun is to make sure that the pony tail is not loose and does not move.

Check to make sure the ponytail is tight and centered before moving onto the next step. Just for safe measure we will take the ends of the pony tails and pull them a little bit towards the athlete. Add a little more hair spray and comb it towards the pony tail one more time.

If you find parts of the hair are having a hard time staying under the pony tail then you can take a bobby pin to help keep the hair flat and neat.
Little Trick to Maximize Volume
Step 4
For a fuller hair bun split the ponytail into different sections and tease them slightly in the direction towards the beginning of the pony tail. This provides a fuller look for the hair bun with more volume. bun which is a great tip for those with thinner hair.


Making the Gymnastics Hair Bun
Step 5
Pull out the pony tail again and slowly start twisting the pony tail as you go in a circular motion around the point where the hair bands are. As you start wrapping the pony tail around the bun keep twisting it to maintain a tight bun.

As you start reaching the end keep twisting the pony tail and form it underneath the main bun. After you’ve finished making the hair bun add another hair clip or clips to hold the bun in place.


Adding the Hair Net
Step 6
With our hair bun in place we now use a hair net that matches similar to the models hair color and apply it to help again secure some single hairs that may have come out of place. We wrap the hair net over the bun 2-3 times but ideally as tight as possible.

We can now remove the hair pin we used to hold the bun in place. Using your hands and the hair net form the bun into the proper shape.

Securing the Hair Bun
Step 7
Next take the pins again, enter them from the upper side of the bun and start pinning the bun down. Use multiple hair pins to pin the bun all around.

After adding all the pins, take hair spray and spray the hair down. Take the comb again and comb the hair again towards the bun.


Finishing Steps
Step 8
The hardest steps are down. Now we secure and design the hair near the hair bun with hair clips. I like to use hair clips that can match the models uniform or leotard.

Once you added that hair clips all around add a final round of hair spray to keep everything in place. add more hair spray and pat or brush any stray hairs into place.

Now we have a finished hair bun ready for competition or training.